Insulating an Autumn House for Maximum Comfort
Insulating an Autumn House for maximum comfort is more than just a home improvement project; it’s an investment in year-round comfort and significant energy savings. This guide explores the essential steps involved in optimizing your home’s insulation for the autumn season and beyond, from assessing your current insulation levels to selecting the right materials and implementing effective installation techniques.
We’ll delve into practical solutions for addressing air leaks, enhancing comfort with supplementary measures, and analyzing the long-term cost benefits of a well-insulated home. Prepare to transform your autumn experience into one of cozy warmth and energy efficiency.


Autumn’s crisp air and falling leaves bring a unique set of challenges for homeowners. Maintaining a comfortable indoor temperature without excessive energy consumption requires careful consideration of your home’s insulation. This guide provides a comprehensive approach to assessing your home’s insulation needs, choosing appropriate materials, and implementing effective installation methods. We’ll cover everything from identifying and sealing air leaks to exploring additional comfort-enhancing strategies, ensuring your home remains a sanctuary of warmth and tranquility throughout the autumn months and beyond.
Assessing the Autumn House for Insulation Needs
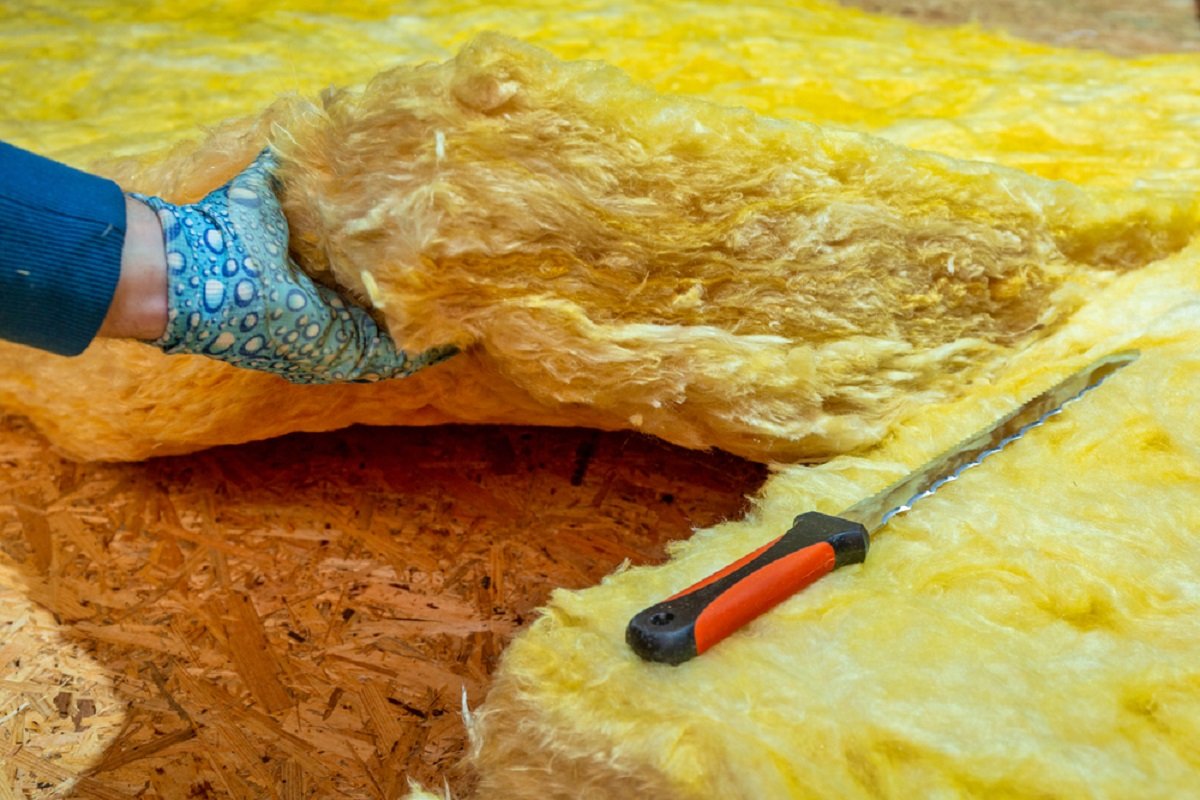
Source: co.uk
Preparing your autumn house for the colder months requires a thorough assessment of its existing insulation. Understanding the current state of your home’s insulation will allow you to prioritize areas needing improvement and maximize energy efficiency, leading to greater comfort and cost savings. This assessment involves identifying drafts, evaluating existing insulation materials, and comparing their performance to recommended standards.
Identifying Draft-Prone Areas
Autumn winds can easily penetrate poorly sealed areas of a house, leading to significant heat loss. Common culprits include windows and doors, but drafts can also originate from less obvious sources. A careful visual inspection, along with a simple test using a lit incense stick or your hand, can reveal air leaks around window and door frames, baseboards, recessed lighting fixtures, and even electrical outlets.
Pay close attention to areas where exterior walls meet the roofline or foundation. Older homes, in particular, are often susceptible to drafts around poorly sealed chimneys and attic access points. Addressing these areas is crucial for effective insulation.
Current Insulation Materials
The type and amount of insulation in your walls, attic, and floors directly impact the home’s ability to retain heat. Common insulation materials include fiberglass batts, cellulose insulation (recycled paper), foam board insulation, and spray foam. The age of your house will often dictate the type of insulation present. Older homes might have inadequate insulation or materials with lower R-values compared to modern standards.
Optimizing your home’s insulation is key to autumn comfort; reducing energy waste translates directly to lower bills. This ties into the larger picture of national energy security, as explored in this article on how does green energy affect energy independence and national security , highlighting the importance of efficient energy use. Ultimately, a well-insulated home contributes to both personal comfort and broader energy sustainability goals.
Knowing the existing materials is crucial for planning improvements. For example, an older home might have only a thin layer of fiberglass batts in the attic, while newer homes may utilize spray foam insulation in the walls.
R-Value Comparison
The R-value of insulation represents its resistance to heat flow. A higher R-value indicates better insulation. Recommended R-values vary depending on climate and building code, but generally, attics should have R-38 to R-60, walls R-13 to R-21, and floors R-19 to R-30 for optimal comfort in a typical autumn climate. To compare, you can physically inspect existing insulation in your attic, walls (if accessible), and floors, looking for labels indicating the R-value.
If the R-value is unknown, you can estimate based on the thickness and type of insulation. For example, a 6-inch fiberglass batt might have an R-19 value, while a 12-inch batt of the same type would have an R-38 value. Comparing these values to the recommended levels for your region will highlight areas where insulation upgrades would be most beneficial.
Insulation Effectiveness Assessment Plan
A comprehensive assessment of insulation effectiveness involves both visual inspection and temperature readings. The visual inspection, as previously described, identifies potential air leaks and assesses the condition and quantity of existing insulation. Temperature readings can be taken using an infrared thermometer to pinpoint areas of heat loss. For example, compare the temperature of an exterior wall in a room with adequate insulation to a wall with suspected poor insulation.
A significant temperature difference indicates a need for improvement. Additionally, consider taking temperature readings in different areas of the attic and basement to identify areas of heat loss or gain. This data, combined with the visual inspection, provides a clear picture of your home’s insulation needs and allows for a targeted approach to improvements.
Choosing the Right Insulation Materials
Selecting the appropriate insulation material is crucial for maximizing comfort and energy efficiency in your autumn home. The choice depends on several factors, including budget, environmental concerns, and the specific characteristics of your house’s construction. This section will explore the pros and cons of common insulation materials, allowing you to make an informed decision.
Comparison of Common Insulation Materials
The following table compares three popular insulation materials: fiberglass, cellulose, and spray foam. R-value represents the material’s resistance to heat flow; a higher R-value indicates better insulation. Cost is an average estimate and can vary depending on location and installation. Environmental impact considers the material’s manufacturing process and recyclability.
| Insulation Material | R-value per inch | Approximate Cost per unit | Environmental Impact |
|---|---|---|---|
| Fiberglass Batt/Roll | R-3 to R-6 | Low to Moderate | Moderate; contains recycled glass but manufacturing uses energy |
| Cellulose | R-3.1 to R-3.8 per inch | Moderate | Good; primarily recycled paper, lower embodied energy than fiberglass |
| Spray Foam (Open-cell) | R-3.6 to R-4 per inch | High | Moderate to Low; depends on the specific foam type and its components. Can be problematic for air quality during application. |
| Spray Foam (Closed-cell) | R-6 to R-7 per inch | High | Moderate to Low; similar considerations as open-cell, but often more durable and with higher R-value |
Pros and Cons of Insulation Types for Autumn Conditions
Fiberglass batts and rolls are readily available, relatively inexpensive, and easy to install in standard wall cavities. However, they can be itchy to handle and are less effective in filling irregular spaces. Cellulose, a blown-in insulation, conforms well to irregular spaces and offers good sound dampening, but it requires specialized equipment for installation. Spray foam, both open-cell and closed-cell, provides excellent air sealing and high R-value, reducing drafts and improving comfort significantly.
However, it’s more expensive and requires professional installation. For autumn conditions, the superior air sealing of spray foam makes it especially beneficial in preventing cold air infiltration.
Examples of Successful Insulation Projects
A retrofit project in a similar autumn climate in Vermont successfully used cellulose insulation in the attic of an older home, significantly improving energy efficiency and comfort. The homeowner reported a noticeable reduction in drafts and a more stable indoor temperature throughout the fall and winter. Another example involves a new construction project in a Maine home using closed-cell spray foam insulation in the walls and attic.
This resulted in a very energy-efficient home with minimal air leakage, even during strong autumn winds.
Selection Criteria Based on Budget, Environmental Concerns, and House Structure, Insulating an Autumn House for maximum comfort
Budget constraints often dictate the choice of insulation. Fiberglass is the most economical option, while spray foam is the most expensive. Environmental concerns may favor cellulose, made from recycled paper, over fiberglass, which requires energy-intensive manufacturing. The house structure influences the feasibility of different insulation types. Spray foam is ideal for irregular spaces or areas requiring air sealing, while batts and rolls are suitable for standard wall cavities.
For example, a homeowner with a limited budget and a home with standard wall cavities might opt for fiberglass, while a homeowner prioritizing energy efficiency and willing to invest more might choose spray foam.
Insulation Installation Methods for Different Areas
Proper insulation installation is crucial for maximizing the comfort and energy efficiency of your autumn house. The methods employed vary depending on the area being insulated, requiring different techniques and materials for optimal results. Understanding these methods will ensure a successful insulation project.
Attic Insulation Installation
Installing attic insulation effectively reduces heat loss during winter and heat gain during summer. This process typically involves laying insulation batts or loose-fill insulation across the attic floor.
- Prepare the Attic: Clear the attic of any obstructions, such as stored items or debris, ensuring easy access to the entire floor area. Wear appropriate safety gear, including gloves and a dust mask.
- Measure and Cut Insulation: Measure the attic floor area to determine the amount of insulation needed. If using batts, cut them to fit snugly between joists, ensuring complete coverage. If using loose-fill insulation, use a suitable dispensing method to achieve even distribution.
- Install Insulation: Carefully place insulation batts between the joists, ensuring a tight fit to minimize air gaps. For loose-fill, evenly distribute the material to the recommended depth, ensuring consistent R-value across the entire attic floor. Pay close attention to areas around penetrations such as chimneys or vents.
- Seal Gaps and Cracks: Seal any gaps or cracks around the edges of the insulation and around penetrations using appropriate sealant to prevent air leakage.
- Inspect and Adjust: After installation, inspect the insulation to ensure even coverage and proper installation. Make any necessary adjustments to address any uneven areas or gaps.
Exterior Wall Insulation
Insulating exterior walls can significantly improve a home’s energy efficiency and comfort. This can be achieved through cavity filling and exterior cladding.
Cavity wall insulation involves filling the space between the exterior and interior walls with insulation material. This is typically done by injecting loose-fill insulation into the cavity through small holes drilled in the exterior wall. Exterior cladding involves adding an extra layer of insulation to the outside of the existing walls, followed by a new exterior finish. This method is more complex and often requires professional installation.
Floor Insulation
Proper floor insulation is essential for preventing heat loss through the floor and maintaining consistent indoor temperatures. This can be achieved through underlayment and crawl space insulation.
Underlayment insulation is typically used in floors over basements or concrete slabs. This involves laying a layer of rigid foam board insulation directly on the subfloor before installing the finished flooring. Crawl space insulation involves insulating the crawl space walls and ground to prevent heat loss. This can be done using rigid foam boards, spray foam, or loose-fill insulation.
The method depends on the crawl space’s size, accessibility, and moisture level.
Addressing Air Leaks and Sealing Gaps
Air leaks are a significant source of energy loss in any home, particularly noticeable during autumn’s fluctuating temperatures. Sealing these gaps is a crucial step in maximizing comfort and energy efficiency. This involves identifying vulnerable areas, selecting appropriate sealing materials, and implementing effective sealing techniques. Proper air sealing can significantly reduce drafts, lower heating bills, and improve indoor air quality.
Common areas of air leakage in a house include windows and doors (especially around frames and sashes), cracks in walls and foundations, gaps around pipes and electrical outlets, and openings around fireplaces and chimneys. These openings allow conditioned air to escape and outside air to infiltrate, leading to discomfort and increased energy consumption. Effective sealing involves using a combination of materials and techniques to address these various leak points.
The choice of material depends on the size and location of the gap.
Preparing your home for autumn’s chill involves maximizing insulation to ensure cozy comfort. This includes checking for drafts and upgrading insulation materials, but efficient energy use extends beyond the physical structure; understanding your tech’s efficiency is also key. For instance, knowing your laptop’s RAM specifications, easily checked by following the guide at Cara Mengecek DDR RAM Laptop , can help optimize your energy consumption when working from home.
Returning to the house, remember proper window sealing is crucial for maintaining a consistently warm and comfortable interior throughout the season.
Sealing Methods and Materials
Several methods exist for sealing gaps and cracks, each suited to different situations. Caulk is a flexible sealant ideal for filling larger gaps and cracks in areas like window frames, baseboards, and exterior wall cracks. Weatherstripping, on the other hand, is a thin, flexible material used to seal gaps around doors and windows, providing a tight seal against drafts.
Foam sealant, in spray or expanding foam form, is effective for filling larger gaps and cavities, providing excellent insulation alongside air sealing. The choice depends on the gap size and location; caulk is suitable for smaller, more flexible gaps, weatherstripping for moving parts like doors and windows, and foam sealant for larger, less accessible spaces.
Tools and Materials for Air Sealing
Before starting, gather the necessary tools and materials. Having everything prepared beforehand ensures a smooth and efficient process. This will save time and ensure the job is done correctly.
- Caulk (latex, silicone, or acrylic, depending on the application)
- Weatherstripping (foam, rubber, or felt)
- Foam sealant (expanding foam or spray foam)
- Caulk gun
- Utility knife or scissors
- Measuring tape
- Putty knife
- Cleaning cloths
- Safety glasses
- Gloves
Air Sealing Plan for an Autumn House
A comprehensive air sealing plan prioritizes critical areas to maximize impact. This involves a systematic approach, focusing on the most significant sources of air leakage first. This approach ensures efficient use of resources and the greatest improvement in comfort and energy efficiency.
- Windows and Doors: Begin by sealing gaps around window and door frames using caulk and weatherstripping. Pay close attention to areas where the frames meet the walls and the sashes meet the frames.
- Exterior Walls: Inspect exterior walls for cracks and gaps, particularly around pipes and electrical outlets. Fill these gaps with caulk or expanding foam, depending on the size of the gap.
- Foundation: Check the foundation for cracks and gaps, especially where the foundation meets the walls. Fill these with caulk or expanding foam, ensuring a thorough seal to prevent drafts.
- Attic Access: Seal any gaps around the attic access door or hatch using weatherstripping or caulk.
- Electrical Outlets and Switches: Seal gaps around electrical outlets and switches with caulk or foam sealant.
Enhancing Comfort with Additional Measures: Insulating An Autumn House For Maximum Comfort
Optimizing your autumn home comfort extends beyond robust insulation. Strategic additions and interior design choices can significantly boost warmth and reduce energy consumption, creating a cozy and energy-efficient environment. These supplementary measures work in conjunction with proper insulation to maximize your home’s ability to retain heat and minimize energy loss.
Beyond the foundational insulation discussed previously, several simple yet effective strategies can enhance your home’s comfort during the autumn months. These methods focus on preventing heat loss through windows, doors, and strategic interior design choices to create a warmer, more inviting atmosphere.
Thermal Curtains and Window Films
Thermal curtains and window films provide an extra layer of insulation against heat loss through windows, a significant source of energy escape in autumn. Thermal curtains, typically lined with insulating materials like fleece or heavy fabric, create an air pocket that traps heat inside. Window films, on the other hand, are thin, transparent films applied directly to the windowpane.
They work by reducing heat transfer through the glass. The combined effect of these two methods can lead to a noticeable increase in room temperature and a reduction in heating costs. For instance, a study by the Lawrence Berkeley National Laboratory showed that heavy curtains can reduce heat loss through windows by up to 30%. Window films can achieve similar results, depending on their quality and construction.
Draft Stoppers and Door Sweeps
Drafts are a major contributor to discomfort and energy waste. Draft stoppers, which can be simple fabric tubes or more elaborate commercial products, are placed at the base of doors to block cold air from seeping in. Door sweeps, installed along the bottom of exterior doors, provide a similar function, creating a tight seal that prevents drafts. These inexpensive solutions can make a significant difference in overall comfort and energy efficiency.
Consider the reduction in noticeable drafts as a key indicator of their effectiveness. A well-placed draft stopper can eliminate a persistent chilly breeze along the floor, improving comfort considerably.
Interior Design Strategies for Heat Retention
Strategic interior design can significantly enhance a home’s ability to retain heat. Using rugs to cover hard floors, for example, helps to insulate the floor and prevent heat loss to the ground. Similarly, arranging furniture to minimize drafts and maximize heat circulation can contribute to a warmer feel. Consider positioning furniture to block cold air currents near windows or doors.
Darker-colored walls and furnishings absorb more heat than lighter colors, subtly contributing to a warmer room. This is particularly effective in rooms with limited sunlight. For example, a south-facing living room might benefit from darker-colored furniture to maximize the absorption of sunlight during the day.
Energy-Efficient Heating Options for Autumn
Several energy-efficient heating options are well-suited for autumn’s milder temperatures. Programmable thermostats allow for precise temperature control, reducing energy waste by automatically adjusting the heating schedule. Heat pumps offer efficient heating and cooling, and they are particularly effective in milder climates. Radiant floor heating provides even, comfortable warmth and is highly energy-efficient. Finally, high-efficiency furnaces or boilers minimize energy loss during the heating process, ensuring that less energy is wasted and more heat is delivered to your home.
The choice will depend on your home’s existing infrastructure and individual needs, but focusing on efficiency is key to minimizing energy costs and environmental impact.
Cost Analysis and Long-Term Benefits
Insulating your autumn house is an investment that yields significant returns over time. While the initial outlay for materials and labor can seem substantial, the long-term savings on energy bills and the environmental benefits far outweigh the upfront costs. This section details a cost breakdown and explores the financial and ecological advantages of improved home insulation.
Material Costs
The cost of insulation materials varies greatly depending on the type chosen, the R-value required (a measure of thermal resistance), and the quantity needed. For example, fiberglass batts, a common choice, might cost between $0.50 and $2.00 per square foot, while spray foam insulation can range from $1.00 to $5.00 per square foot, depending on the density and application.
Other materials like cellulose insulation or rigid foam boards will also fall within a similar price range, varying based on the specific product and its R-value. Remember to factor in the cost of any additional materials required for installation, such as vapor barriers, sealant, and fasteners. Accurate pricing should be obtained from local suppliers based on your specific house’s needs.
Labor Costs
Labor costs represent a significant portion of the overall insulation project expense. Hiring professional installers is recommended, especially for complex jobs involving spray foam or difficult-to-access areas. Labor costs vary by location and the complexity of the project, generally ranging from $2 to $10 per square foot or more. DIY insulation is possible for some projects, such as installing batts in attics or walls, which can significantly reduce labor costs.
However, improper installation can negate the benefits of the insulation, leading to wasted money and potential energy loss. It’s important to carefully weigh the cost savings against the risk of DIY errors.
Energy Savings and Reduced Carbon Footprint
Improved insulation significantly reduces energy consumption by minimizing heat loss in winter and heat gain in summer. This translates to lower heating and cooling bills. For instance, a house with inadequate insulation might spend $2000 annually on heating and cooling. After proper insulation, this cost could be reduced by 30% to 50%, saving $600 to $1000 annually. These savings accumulate over time, quickly offsetting the initial investment.
Simultaneously, reduced energy consumption directly contributes to a smaller carbon footprint, aligning with environmentally conscious practices.
Long-Term Return on Investment (ROI)
The ROI on insulation upgrades is typically high. Considering the cumulative savings on energy bills over the lifespan of the insulation (often 15-30 years or more), the initial investment is usually recouped within a few years. For example, if the total cost of the insulation project is $5000 and annual energy savings are $800, the ROI is achieved within approximately 6 years.
The remaining years provide continued savings, making it a financially sound and environmentally responsible home improvement.
Cost-Effectiveness Comparison of Insulation Methods
Different insulation methods vary in cost-effectiveness. Fiberglass batts are generally the most affordable upfront, but may require more labor for proper installation and might not offer the same R-value per inch as spray foam. Spray foam, while more expensive initially, often provides superior air sealing and a higher R-value per inch, leading to potentially greater long-term energy savings. Cellulose insulation offers a good balance between cost and performance, while rigid foam boards are excellent for specific applications like exterior wall sheathing.
Optimizing your autumn home’s insulation is key for comfortable living, significantly reducing energy consumption. This is especially relevant when considering sustainable heating options, as detailed in this informative article on green energy solutions for remote or off-grid communities , which highlights how efficient insulation complements renewable energy sources. Proper insulation, therefore, not only enhances comfort but also contributes to environmentally conscious home management.
The most cost-effective method depends on the specific needs of the house, considering factors like existing construction, climate, and budget. A detailed cost-benefit analysis comparing different insulation types, factoring in material costs, labor, and projected energy savings, is essential for making an informed decision.
Summary
By carefully assessing your home’s insulation needs, selecting appropriate materials, and implementing effective installation techniques, you can significantly enhance your autumn comfort and reduce energy consumption. Remember that a well-insulated home is not only warmer and cozier but also represents a smart investment with long-term financial and environmental benefits. This guide provides a roadmap to achieving optimal autumn comfort; now it’s time to put the plan into action and enjoy the rewards of a warm, energy-efficient home.
Answers to Common Questions
What is the best time of year to insulate my house?
While autumn is a great time to prepare, spring and summer offer better working conditions, especially for exterior work.
Can I insulate my home myself?
For smaller projects like attic insulation or air sealing, DIY is often feasible. Larger projects, such as exterior wall insulation, are best left to professionals.
How long does it take to insulate a house?
The time required varies greatly depending on the size of the house and the scope of the project. It could range from a few days to several weeks.
What are the potential risks of improper insulation installation?
Improper installation can lead to reduced effectiveness, moisture buildup (mold growth), and even structural damage.
How do I know if my current insulation is sufficient?
Check the R-value of your existing insulation and compare it to recommended levels for your climate. Conduct a visual inspection for gaps, moisture, or settling.